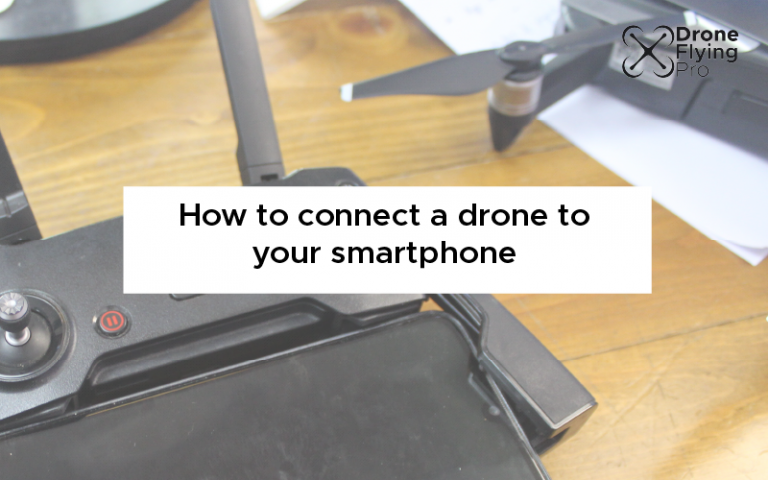
Learning to connect the drone to your phone or smart device is one of the first steps in ensuring that you can stream the first-person view from your drone while flying. Your phone will also act as a dashboard that displays a lot of information about your flight. The most important information about your flight includes the battery time and the location of your drone during the flight.
To connect your drone camera to your phone, you will need to download the manufacturer’s app for the drone model. Then ensure your drone is turned on with lots of battery remaining, and connect the drone via the remote or Wi-Fi using software buttons and prompts.
Drone manufacturers are making the app interface much easier to use and navigate because they want you to fly as quickly as possible after receiving the drone in the mail.
Here are the three steps you need to go through to connect your drone to phone easily. I have included animations for each step to make it as clear as possible for you.
Devices recommended by DJI for running their drone app:
| Apple phones | Android Phones |
| iOS Version V 1.5.10 Requires iOS 11.0 or above. iPhone 13 Pro Max, iPhone 13 Pro, iPhone 13, iPhone 13 mini, iPhone 12 Pro Max, iPhone 12 Pro, iPhone 12, iPhone 12 mini, iPhone 11 Pro Max, iPhone 11 Pro, iPhone 11, iPhone XS Max, iPhone XS, iPhone XR, iPhone X, iPhone 8 Plus, iPhone 8 | Android Version V 1.5.10 Requires Android 6.0 or above. Samsung Galaxy S21, Samsung Galaxy S20, Samsung Galaxy S10+, Samsung Galaxy S10, Samsung Galaxy Note20, Samsung Galaxy Note10+, Samsung Galaxy Note9, HUAWEI Mate40 Pro, HUAWEI Mate30 Pro, HUAWEI P40 Pro, HUAWEI P30 Pro, HUAWEI P30, Honor 50 Pro, Mi 11, Mi 10, Mi MIX 4, Redmi Note 10, OPPO Find X3, OPPO Reno 4, vivo NEX 3, OnePlus 9 Pro, OnePlus 9, Pixel 6, Pixel 4, Pixel 3 XL |
Some drone brands and manufacturers also offer lite versions of their software for older phones. Head to their website to see if they have a lite version of their application for a particular drone.
Now we are ready to connect to our drone!
1. Download the App onto your mobile device to connect drone
The first step is to head over to the mobile app store for your operating system
Here is a link to the android and iPhone App Store for the DJI GO4 app.
You’ll notice that there are relatively low reviews for these drone apps. Even though manufacturers try their very best, there is a wide range of android and iPhone smartphones on the market, and these can quite often be because of problems with phone compatibility.
I have been using the DJI GO 4 app for a number of years on my older drones with no issues.
Some people opt for third-party drone apps to control their drones because they do not like the ones supplied by the manufacturer. There are plenty of alternatives to manufacturers’ drones, and the most popular are shown below.
Third-party drone flying apps
The great thing about third party drone flying apps is that they often have a much better user experience. Drone manufacturers have to focus on the drone’s hardware and produce a slick and seamless user experience in their app.
The companies that create third-party drone apps can only focus on creating a fantastic user experience that can rival and better the manufacturer’s app.
Litchi
This software, available on the Google Play Store and the iTunes App Store, has over 4000 successful daily flights.
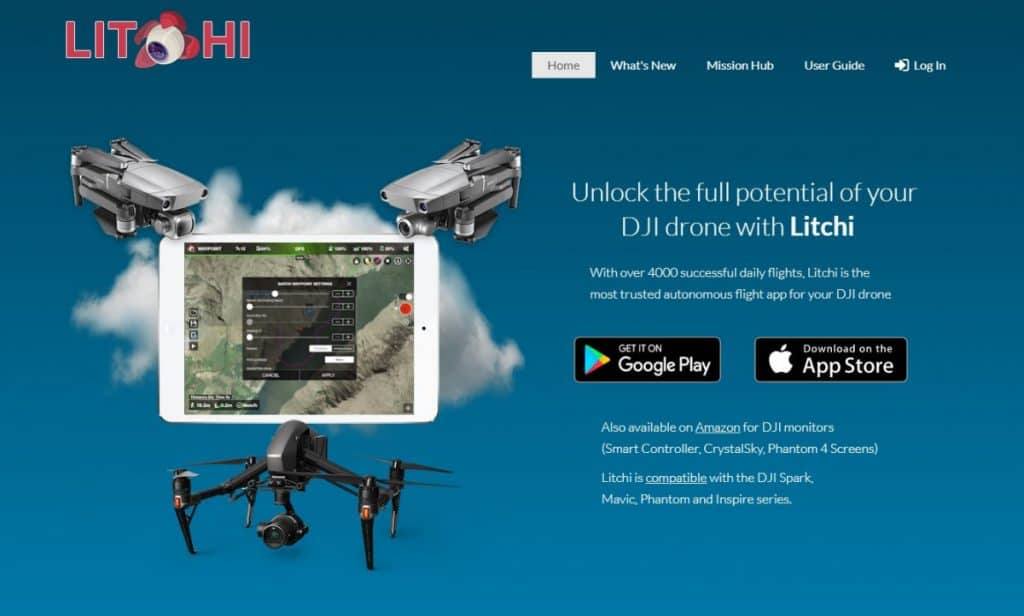
The DJI Spark, Mavic, Phantom, and Inspire lines of drones are all compatible with the app.
The user interface is straightforward, and it includes a sophisticated waypoint mission planner. It is also available on all platforms and operating systems, allowing you to sink your missions across many devices with ease.
The Litchi app is not free, but for a one-off payment, it can be one of the best investments you make into your drone flying experience.
$22.99 (iOS) $24.99 (Android)
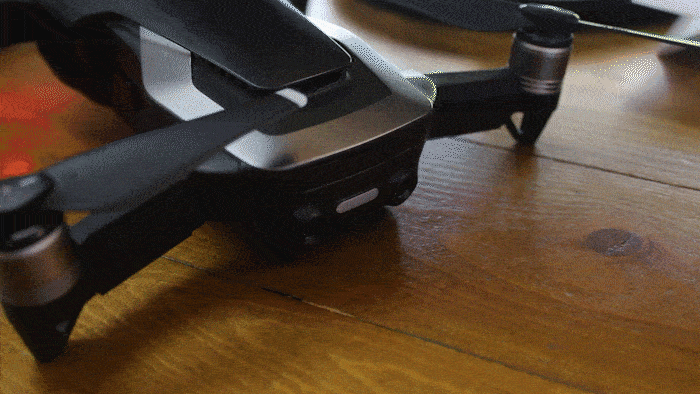
2. Prepare to connect your drone – turn on your drone
After downloading the app, you need to prepare your drone for connection.
In my experience, there are some things that you can do to ensure that it is not a stressful experience, such as charging up your drone battery so that you have plenty of time to connect should things go wrong.
The drone start-up sequence should be allowed to run entirely, and you will often see a flashing standby light before connecting to the drone. For example, my DJI Mavic air flashes yellow to show that it is not connected to a remote or phone.
3. Connect the drone app to the drone
You can generally connect to a drone using the remote control or a direct WiFi connection.
Here are examples and the general steps for connecting to the drone using each method.
Via remote control
Connect the smartphone to the drone and follow the steps presented to you in your app. Typically you need to select your drone from a list of drones made by the manufacturer.
Here it is for the DJI GO4 app connecting to a DJI Mavic Air:
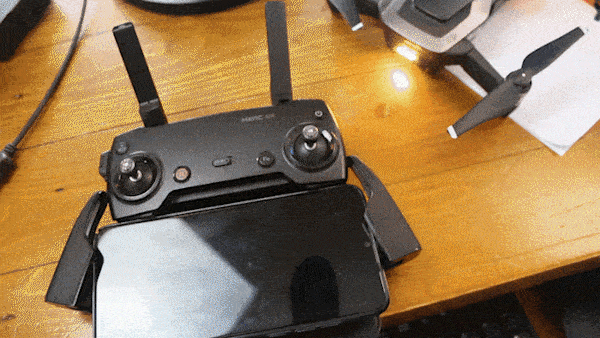
The general steps for drone connection to the remote are:
- Connect your phone to the remote using the supplied cables
- Turn on remote
- Open the app
- Follow all onscreen instructions
- If it is your first time connecting you may have to press a button on the drone
- Wait for connection
- Go and fly your drone!
Via Wi-Fi or Bluetooth
You can also connect to drones using WiFi and Bluetooth. This does not require you to connect to the wifi network – you need to connect directly to the drone.
Here is how you connect to the DJI Mavic Air using the GO4 app via a direct WiFi connection:
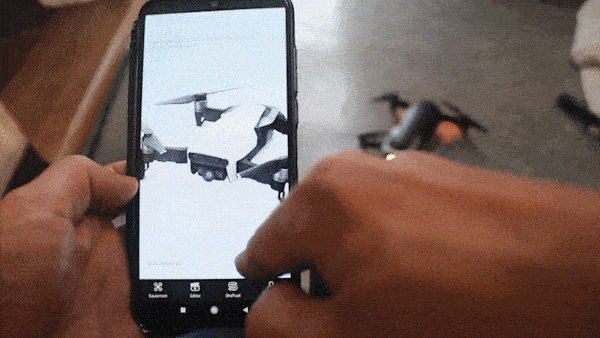
If you are connecting the the drone for the first time you may need to scan a QR code on the drone or press a button on the drone. After going through these connection steps you should be able to control your drone and the drone controller.
Apps for different manufacturers
Here are the applications used by different manufacturers. You’ll notice the DJI GO4 app and the DJI FLY app.
The FLY app is a simplified and intuitive version so you can fly quicker and easier.
| Drone Manufacturer – Model | Apple | Android |
|---|---|---|
| DJI GO4 – Mavic, Spark, Phantom, Inspire | Link to App | Link to App |
| DJI FLY – Mavic Mini, Mavic Air 2, DJI Mini 2, DJI FPV, DJI Air 2S, DJI Mini SE, DJI Mavic 3 | Link to App | Link to App |
| Parrot Drones | Link to App | Link to App |
| Autel Drones | Link to App | Link to App |
| Skydio Drones | Link to App | Link to App |
| Hubsan Drones | Link to App | Link to App |
Important app settings after connecting your drone to your phone
When you first log in to the app, you should get familiar with some important settings. These settings include the maximum height of your drone, setting the sensitivity of the remote controller joysticks so that you can capture smooth and cinematic drone footage, as well as getting used to all of the on-screen display items for your flight (this one will ensure you are safe )
Maximum height
One of the first things you should set when you receive your drone is the maximum height your drone will fly.
To stay legal during your flight, you will have to set a maximum height of 120m or 400 ft.
EXP settings
Changing your drone’s EXP settings is one of the simplest methods to get smoother footage and more control over your drone.
These settings translate the movements of your controller stick to the drone’s movement. They effectively govern how far and fast the drone moves in response to joystick movement.
You can find them here: Main Controller Settings > Advanced Settings > EXP
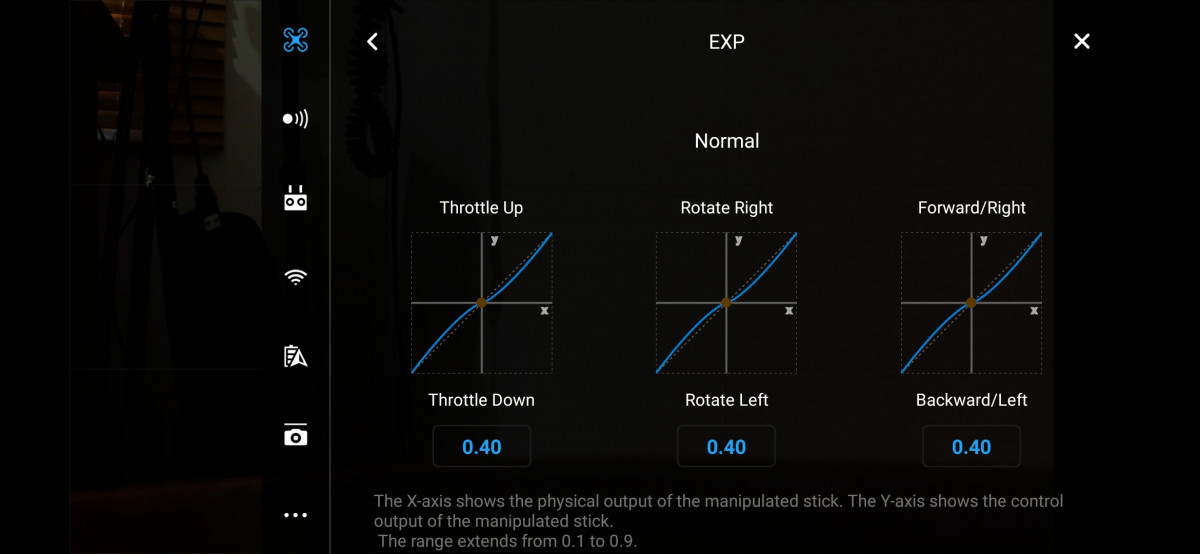
Three graphs with exponential curves can be found in the settings. To modify the shape of the graphs, change the fraction below each one. You can also manually adjust the shape of the graph by sliding the curve with your finger. Change the settings to a lower number, such as 0.15, to notice how the joystick reaction changes.
I like to have mine set so that the initial movement doesn’t change the drone’s movement very much. This graph shape allows me to achieve much more intricate and slow direction changes than if it was a straight line.
Camera settings
Setting your camera options as soon as you purchase a drone will help you capture the perfect videos during your flight.
My first changes include setting the codec, resolution, colour, video format and white balance of my drone camera.
| Codec | H.264 (8-bit) |
| Resolution | Highest your drone will allow, and your computer can edit (HD or 4K) |
| Colour profile | Normal or DLog-M (advanced users) |
| Video format | MP4 or MOV |
| White balance | Sunny or Cloudy |
These settings will help you get started with your drone, and they won’t alter much for most drone videographers. You won’t have to worry about fine-tuning your manual settings until you go into the professional range of drones (where DSLRs are suspended below the rotors) to get the perfect images.
On-screen display items
Once connected, the app will show you a load of data when you are flying. Some of this data is there to keep you safe and ensure that your drone remains safely. Make sure that you understand the on-screen information shown to you by your chosen drone app to know exactly where all of the important information is located for glances during the flight.
An on-screen display can present you the following sources of information:
- Timer- this could be “flight time” or “on time”, depending on the type of on-screen display you have purchased and installed.
- Battery voltage – one of the most significant characteristics of an on-screen display is the ability to read the voltage from the battery, which practically all units support. The battery voltage readout will alert you to land before the battery is overcharged. A lithium polymer battery that is entirely depleted is a dead battery.
- Current – During a flight, you’ll be able to see how much current is being pulled from your lithium polymer battery as well as the overall milliamp hours utilised. This is a much better measure of how much capacity you still have than the battery voltage.
- Radio signal strength – the RSSI is a percentage representation of the radio signal strength. This will alert you when you need to go closer to the remote control due to range issues.
- Warnings – you can set up alerts on several on-screen displays to notify you when critical flight values are reached.
- Flight mode — If you’re a pilot who frequently shifts between flight modes, this could be the ideal readout for you to make sure you’re always in the one you choose.
- Artificial horizon – An artificial horizon is a screen centre line that shows you where the drone is oriented to the horizon.
Is a phone or tablet better for your drone camera usage?
When I first purchased my drone, I used my smartphone as the remote control screen. I have often toyed with buying a tablet dedicated to my drone flying due to the increased size of the screen and the longer battery life.
Here are the pros and cons of using a tablet, and, in the end, I will share with you what I ended up doing for my drone missions.
Why a tablet is better
There are plenty of reasons why you may want to get a tablet for your remote control. Most remote controls come with the option of adding a larger smart device and providing adapters for them.
There are many benefits of getting a tablet, and these are the pros and cons. This
Larger screen
Having a much larger screen for your drone’s first-person view means you can see much more of the camera’s view whilst retaining all of the information for the on-screen display.
I often find myself squinting at my phone to see the small details of the camera feed.
You have a better resolution with a larger screen because of the much larger display.
Flying a drone is accompanied by a lot of data. Data about the battery, position, and state of the drone. A larger screen allows you to monitor these data much more efficiently than a smaller screen.
A dedicated device for drone
having a dedicated device for a drone means that you’ll never be caught out with a low battery or a non-functional smart device.
Our smartphones follow us throughout our lives and are prone to damage during our daily activities. Having a dedicated device for your drone means that you can be confident that you’ll be able to fly using your dedicated device.
Smart devices also tend to have many other applications and downloads. Having a dedicated device for your drone means that you can be assured that no other app will be running in the background and hogging the precious memory required for your drone flight.
Longer battery life
Tablets also have a much longer battery life due to their increased size and battery capacity. I often find that my smartphone lasts 2 to 3 flights before recharging it. A tablet would last much longer.
The internal battery of the remote control can also charge a mobile phone or smart device and draw charge from a fully charged smart device. This two-way energy flow means that the tablet can also recharge the remote control from its significantly larger battery.
Why tablet is worse
As with everything, a tablet comes with drawbacks as well as benefits. Here are a few of the drawbacks of using a tablet to connect to your drone camera.
Heavier remote
Because the tablet is fixed to the remote control, it can result in a much heavier remote control with a weird centre of gravity.
Tablets can weigh a significant amount, and if you are doing long flights, you could end up with extra fatigue in your four arms and wrists. I recommend utilising a neck strap for remotes connected to a smart tablet.
More expensive
Using tablet results in a much more expensive remote control than using your smartphone. The benefit of using your smartphone is that you always have it with you, and it is already in your possession. You do not need to purchase extra equipment.
Serious drone professionals should consider buying a tablet for client work.
Otherwise, the hobby drone pilot can get away with using their smartphone for the majority of their flight missions.
Extra equipment to carry
Carrying all of your drone equipment in a bag is becoming harder and harder. Purchasing an extra tablet dedicated to your drone flight can result in extra equipment carrying and getting in the way.
Use a dedicated smartphone
Another option for those who do not want to purchase a tablet could be purchasing and utilising a dedicated smartphone or your drone flights.
There are plenty of inexpensive smart devices that can easily connect to a drone remote and have the appropriate internal hardware to run the piloting applications.
Summary: How to connect drone camera to your phone
In this article, we have been over everything you need to know about connecting your drone camera to a smartphone and provided detailed animations and options for making your experience connecting to your drone a much nicer experience.